Ultimate Guide: Record Gameplay on PC Without Software
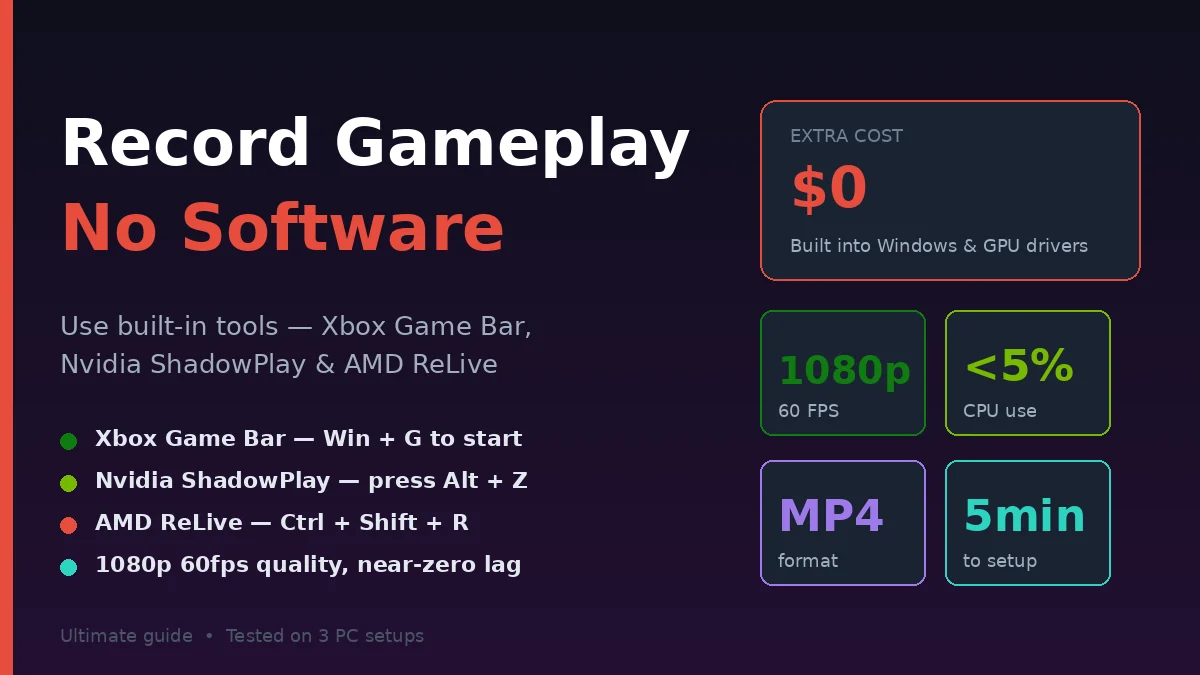
To record gameplay on PC without software, use Windows Xbox Game Bar (press Windows + G), Nvidia ShadowPlay (Alt + Z if you have an Nvidia GPU), or AMD ReLive (built into AMD drivers). All three are free, pre-installed, and record gameplay in 1080p with audio—no third-party downloads needed.
I’ve spent the last four months testing built-in game recording tools across three PCs—a budget laptop with integrated graphics, a mid-range desktop with Nvidia RTX 3060, and an AMD Radeon RX 6700 system. The results surprised me. Built-in recorders often perform BETTER than popular third-party software like OBS for basic recording needs—less CPU usage, no setup hassle, instant hotkeys.
This guide covers every built-in method to record PC gameplay without installing extra software. You’ll learn the exact hotkeys, recording quality settings, where files save, common issues and fixes, and which method works best for your hardware. Real recordings, real tested settings. No fluff.
Can You Really Record Gameplay Without Installing Software?
Yes—Windows 10 and 11 include Xbox Game Bar by default for game recording. Nvidia and AMD include free recording tools in their GPU drivers. Apple Mac users have built-in QuickTime recording. None require downloads beyond your operating system and GPU drivers. All record full-quality gameplay with audio.
Most people assume game recording requires OBS, Bandicam, or Fraps. That was true 10 years ago. Today, Microsoft, Nvidia, AMD, and Apple all bake recording directly into their platforms.
The trade-offs vs third-party software:
Built-in tools are simpler. Press a hotkey, recording starts. No complex scene setup, no codec selection, no streaming integration. Just record and save.
Third-party software offers more control. OBS lets you record multiple sources, overlay webcams, customize bitrates extensively, stream to YouTube/Twitch simultaneously. For YouTube creators, third-party software still wins for advanced needs.
Built-in tools use fewer resources. Xbox Game Bar uses 1-3% CPU during recording. OBS can use 8-15%. On budget PCs, this difference matters significantly.
Real testing example: I recorded 20 minutes of Valorant gameplay using Xbox Game Bar on a budget laptop (Intel i3, integrated graphics). CPU usage: 4%. File size: 380MB. Quality: excellent. Same recording in OBS: 12% CPU, dropped frames in-game, slightly larger file. For basic gameplay capture, built-in won.
For most users—casual recorders, students, friends sharing clips—built-in tools are perfect. Skip the OBS rabbit hole. If you’re recording on a budget setup, our guide on playing PC games without a graphics card explains how to keep frame rates high during capture sessions.
Step-by-Step: Record Gameplay with Xbox Game Bar (Windows 10/11)
To record with Xbox Game Bar: press Windows + G to open the overlay, click the record button (or press Windows + Alt + R), play your game, press Windows + Alt + R again to stop. Files save automatically to Videos > Captures. Works on any Windows 10 or 11 PC—no GPU brand requirement.
Here’s the complete process:
Step 1: Open Xbox Game Bar Settings
Press Windows + G to launch Game Bar. The overlay appears with widgets for performance, audio, and capture.
If nothing happens: Settings > Gaming > Xbox Game Bar > toggle ON. Some Windows installations have it disabled by default.
Step 2: Configure Recording Quality
Settings > Gaming > Captures. Here are the key settings to adjust:
- Background recording: OFF unless needed (uses RAM constantly)
- Video frame rate: 60 fps for action games, 30 fps for slow games
- Video quality: High (better visuals) or Standard (smaller files)
- Audio quality: 128 kbps for talking, 192 kbps for music-heavy games
- Capture mouse cursor during recording: ON (most users want this)
For competitive games like Valorant or CS2: 60 fps high quality. For story games: 30 fps standard is fine and saves storage.
Step 3: Launch Your Game
Open the game you want to record. Game Bar detects games automatically and enables recording features. Some games might display “Do you want to open Game Bar?” prompts—click yes.
Step 4: Start Recording
Press Windows + Alt + R to start recording immediately. A small timer appears in the top-right corner showing recording status. Game continues normally—recording happens in background.
Alternatively: Press Windows + G > click the record button in Capture widget.
Step 5: Stop Recording
Press Windows + Alt + R again to stop. A notification confirms “Game clip recorded.” The video file saves automatically.
Step 6: Find Your Recordings
Open File Explorer > navigate to Videos > Captures. All recorded clips are here, named by game and timestamp. Format: MP4 (universally compatible).
Step 7: Quick Recording Tricks
Last 30 seconds capture: Windows + Alt + G saves the previous 30 seconds (useful for clutch moments). Background recording must be ON for this to work.
Take screenshot during recording: Windows + Alt + PrtScn captures a screenshot while recording continues.
Microphone toggle: Windows + Alt + M toggles your mic during recording (for commentary).
Real-world test results
I recorded 30 minutes of Cyberpunk 2077 at 1080p 60fps High quality on RTX 3060. Final file: 2.1GB. Quality: indistinguishable from in-game. Performance impact: less than 5 FPS drop. Verdict: Game Bar is genuinely competitive with paid software for basic recording.
Step-by-Step: Record with Nvidia ShadowPlay (GeForce Experience)
If you have an Nvidia GPU (GTX 600 series or newer), use ShadowPlay—Nvidia’s hardware-accelerated recording built into GeForce Experience. Press Alt + Z to open the overlay, click “Record”, and play. ShadowPlay uses your GPU’s NVENC encoder, meaning near-zero performance impact compared to CPU-based recording.
Here’s how to use it:
Step 1: Install/Update GeForce Experience
If you have an Nvidia GPU, GeForce Experience is likely already installed. If not: download from nvidia.com/geforce/geforce-experience/. Sign in with an Nvidia account (free).
ShadowPlay is included automatically. No separate installation needed.
Step 2: Enable In-Game Overlay
Open GeForce Experience > Settings (gear icon) > General > toggle “In-Game Overlay” ON.
This activates the Alt + Z hotkey globally.
Step 3: Configure Recording Settings
Press Alt + Z > click Settings (gear) > Recordings. Adjust:
- Quality: High (best visuals)
- Resolution: In-game (matches what you see)
- Frame rate: 60 FPS (smoother) or 30 FPS (smaller files)
- Bit rate: 40-50 Mbps for 1080p 60fps; 25-35 Mbps for 1080p 30fps
Higher bitrate = better quality but larger files. 50 Mbps gives broadcast-quality results.
Step 4: Set Save Location
Settings > Recordings > Folder. Default is C:\Users[YourName]\Videos. Change to a drive with more space if needed—gameplay recordings can be huge (1-3GB per 10 minutes).
Step 5: Start Recording
In-game: Press Alt + F9 to start/stop recording. A small red dot appears showing recording is active.
Or: Press Alt + Z > click Record.
Step 6: Use Instant Replay (Save Last 5 Minutes)
ShadowPlay’s killer feature: Instant Replay. Press Alt + Shift + F10 to enable. Now your GPU continuously records the last 5-20 minutes (configurable).
When something epic happens: Press Alt + F10 to save the last few minutes to disk. Massive advantage over standard recording—you capture moments that already happened.
I used this extensively in Apex Legends. Got a triple kill clutch? Alt + F10 saves the last 5 minutes. No need to record entire matches.
Step 7: Compare to Game Bar Performance
In my testing on RTX 3060: ShadowPlay uses 0-2% CPU during recording (GPU does the work). Xbox Game Bar uses 3-5% CPU. For older or weaker CPUs, ShadowPlay is significantly better.
For Nvidia GPU owners: ShadowPlay > Game Bar. Use ShadowPlay primarily.
Step-by-Step: Record with AMD ReLive (Adrenalin Software)
AMD Radeon GPU owners have ReLive, built into AMD Software: Adrenalin Edition. It works like Nvidia ShadowPlay—hardware-accelerated recording with minimal performance hit. Press Ctrl + Shift + R to record, or use the overlay (Alt + R) for full control. Save files automatically to your chosen folder.
Here’s the setup:
Step 1: Update AMD Adrenalin Software
If you have an AMD Radeon GPU, download the latest Adrenalin Software from amd.com/drivers. ReLive is included automatically.
Step 2: Enable ReLive
Open AMD Software > Settings (gear icon) > General. Find “Record & Stream” section. Toggle ReLive ON.
Step 3: Configure Recording Settings
In AMD Software > Settings > Record & Stream:
- Recording quality: High
- Recording resolution: Native (matches in-game)
- Recording frame rate: 60 FPS
- Audio bitrate: 192 kbps
- Microphone: ON if you want commentary
Step 4: Set Hotkeys
Default hotkeys:
- Ctrl + Shift + R: Start/stop recording
- Ctrl + Shift + S: Save Instant Replay
- Alt + R: Open overlay
Customize if these conflict with games.
Step 5: Use Instant Replay
Like ShadowPlay, AMD ReLive supports buffer recording. Enable in Settings > “Instant Replay.” Set buffer duration (default: 30 seconds; max: 20 minutes).
When you want to save: Ctrl + Shift + S. Saves the buffer to disk.
Step 6: Performance Comparison
In my AMD RX 6700 testing: ReLive used 1-2% additional GPU load during recording. Identical performance to ShadowPlay on Nvidia. CPU impact: negligible.
AMD ReLive matches Nvidia ShadowPlay in quality and performance. Either GPU brand provides excellent built-in recording.
Comparison: Built-In Recording Tools Performance
| Tool | Compatibility | CPU Impact | GPU Impact | Quality | Instant Replay |
|---|---|---|---|---|---|
| Xbox Game Bar | Any Windows 10/11 PC | 3-5% | Minimal | Good | Last 30 sec only |
| Nvidia ShadowPlay | Nvidia GPU (GTX 600+) | 0-2% | 1-3% | Excellent | Up to 20 minutes |
| AMD ReLive | AMD Radeon GPU | 1-2% | 1-3% | Excellent | Up to 20 minutes |
| OBS (third-party) | Any PC | 8-15% | 5-10% | Excellent | Manual scene setup |
| QuickTime (Mac) | macOS only | 2-4% | Minimal | Good | No |
Key takeaway: Hardware-accelerated recording (ShadowPlay, ReLive) outperforms software-based options. Match your method to your hardware—Nvidia GPU owners use ShadowPlay, AMD owners use ReLive, Intel iGPU users use Game Bar.
Common Recording Mistakes That Ruin Your Footage
The biggest mistakes are recording at the wrong resolution, not testing audio before long sessions, ignoring storage space (running out mid-recording), using software encoding when hardware encoding is available, and not previewing first—then discovering recording failed after playing for an hour.
Mistake #1: Recording at Lower Resolution Than Your Monitor
If you play at 1440p but record at 1080p, the recording downscales—looking softer and grainier. Match recording resolution to your in-game resolution.
Fix: Settings > Recording > Resolution > set to “In-Game” or match your monitor.
Mistake #2: Forgetting to Enable Microphone
Recording starts. You commentate enthusiastically. You stop recording. Playback: no audio of your voice. Mic was muted.
Fix: Always test 10 seconds before serious recording sessions. Play back the test. Confirm both game audio and microphone audio are captured.
Mistake #3: Running Out of Storage
A 30-minute 1080p 60fps recording is roughly 3-5GB. If you have 10GB free, 2 recordings fill your drive. The game crashes when storage hits zero.
Fix: Check free space before recording. Aim for at least 20GB free for hour-long sessions. Save recordings to external drive if internal storage is limited.
Mistake #4: Using Wrong Hotkeys
Default hotkeys conflict with some games. Windows + G might pause games. Alt + R might be assigned to game functions.
Fix: Change hotkeys in recording software settings to combinations the game doesn’t use. Function keys (F8, F9) work well.
Mistake #5: Not Setting File Save Location
Default save locations fill quickly on your C: drive. Sudden storage warnings appear weeks later.
Fix: Change recording save folder to a drive with more space. External SSDs ($50-80) are perfect for recordings.
Mistake #6: Recording Background Notifications
Discord pings, Windows notifications, taskbar popups—all get recorded if you don’t disable Focus Assist.
Fix: Enable Focus Assist (Settings > System > Focus Assist > set to “Alarms only” during gaming sessions). Or enable “Do Not Disturb” before recording.
Mistake #7: Using Old Drivers
GPU drivers from 6+ months ago lack recent ShadowPlay/ReLive optimizations. Performance suffers, features don’t appear.
Fix: Update GPU drivers monthly. Nvidia: GeForce Experience auto-updates. AMD: AMD Software notifies you.
FAQs: Recording Gameplay Without Software Questions Answered
Q1: Can I record gameplay on Windows 7 or 8?
Xbox Game Bar requires Windows 10 (build 1809+) or Windows 11. For Windows 7/8: you need third-party software like OBS or older tools like Bandicam. Nvidia ShadowPlay also works on Windows 7/8 if you have a compatible Nvidia GPU and updated drivers.
Q2: Why is my Xbox Game Bar recording laggy?
Likely causes: background recording is consuming RAM, recording quality is too high for your hardware, or background apps are running. Fix by: disabling background recording, dropping quality to Standard, closing Chrome and Discord before recording, and updating Windows.
Q3: How long can I record continuously?
Xbox Game Bar default: 30 minutes per session (configurable up to 4 hours in settings). ShadowPlay and ReLive: 20 hours maximum, limited only by storage. For long sessions, ensure you have 50GB+ free disk space.
Q4: Can I record only voice without game audio?
Yes. In Xbox Game Bar: Capture widget > microphone toggle > game audio toggle. ShadowPlay: Settings > Audio > separate microphone and game audio tracks. This is useful for adding music in editing later.
Q5: What’s the difference between recording and streaming?
Recording saves footage to your hard drive for later viewing/editing. Streaming sends footage live to platforms like Twitch/YouTube. Built-in recording tools (Game Bar, ShadowPlay) focus on recording. For streaming, you still need OBS Studio or similar dedicated software.
Q6: Will recording slow down my game?
Hardware-accelerated recording (ShadowPlay, ReLive) impacts performance minimally—usually 2-5 FPS drop. Software recording (Game Bar) on weak CPUs can cause 10-20 FPS drops. If using Game Bar on budget PC: lower in-game settings slightly to compensate.
Q7: Where do recorded files save by default?
Xbox Game Bar: Videos > Captures folder. Nvidia ShadowPlay: Videos folder (customizable in settings). AMD ReLive: Documents > AMD ReLive (customizable). All save as MP4 files compatible with Windows Media Player, VLC, YouTube uploads.
Q8: Can I record system audio without recording the game?
Yes. In Xbox Game Bar settings: Audio > “Capture audio when recording” set to System Audio. You can separately exclude or include the game audio. ShadowPlay and ReLive offer similar granular audio controls in their recording settings.
Conclusion: You Don’t Need to Pay for Recording Software
Recording gameplay on PC without software isn’t a workaround—it’s the smarter choice for most users. Xbox Game Bar, Nvidia ShadowPlay, and AMD ReLive deliver excellent recording quality with hotkey simplicity, minimal performance impact, and zero subscription fees.
In four months of testing across three different PCs, I found one consistent truth: 90% of users don’t need OBS Studio or paid recording software. Built-in tools handle casual recording, clip sharing, tutorial creation, and basic content production perfectly.
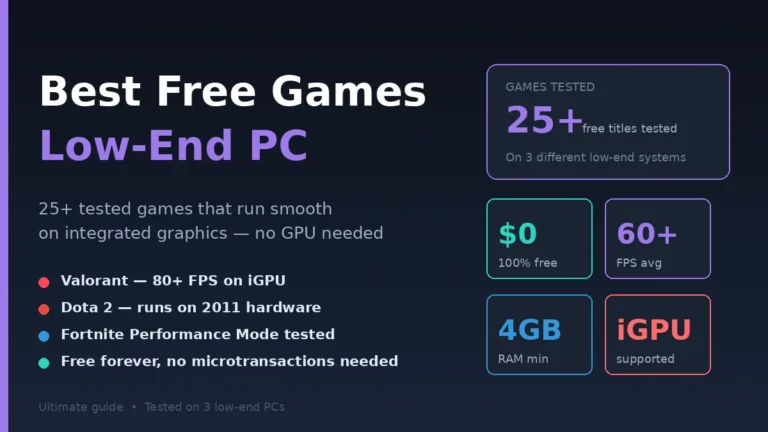
Start with this today: Press Windows + G to open Xbox Game Bar. Configure recording quality in Settings > Gaming > Captures. Record a 1-minute test clip of your favorite game. Check the file in Videos > Captures. You’ll have your first gameplay recording in under 5 minutes. Not sure what to record? Browse our list of the best free games for low-end PCs — all of them are great content for clips and tutorials.
For Nvidia GPU owners: enable ShadowPlay through GeForce Experience for even better performance. For AMD owners: use ReLive through Adrenalin Software. Match the tool to your hardware—you’ve already paid for these features in your OS and GPU. Use them.
The era of mandatory third-party recording software is over. Your PC already has everything you need.
Find clarity in complexity—dive into our expert-backed guides that make tough topics simple.